Short Description:
Learn how to integrate ESLint into your Angular project to catch bugs early, enforce consistent coding standards, and improve team collaboration. Whether you’re building a small app or scaling an enterprise system, ESLint is your first line of defense for clean and maintainable code.
Short Summary:
In this tutorial, we walk through the process of adding ESLint to an Angular project. ESLint is a static code analysis tool that helps you find problematic patterns and enforces best practices. You’ll learn how to:
- Install ESLint as a dev dependency
- Newer versions of Angular (v13+) often include ESLint by default when you create a new project with ng new.
- Add linting scripts to your package. json
- Customize rules
- Run ESLint on your codebase using the CLI
By the end, you’ll have a project that’s not only up and running but also protected by a consistent set of coding standards.
Write-up:
Introduction:
Seamlessly Integrate ESLint into Your Angular Project: A Step-by-Step Guide
In the ever-evolving landscape of web development, maintaining clean, consistent, and error-free code is paramount. For Angular developers, this has meant a shift in tooling. With TSLint being deprecated in Angular v13 and beyond, ESLint has emerged as the new standard for linting TypeScript code.
This guide will walk you through the process of adding and configuring ESLint in your Angular application. We’ll cover the essential commands, explain the generated configuration file in detail, and show you how to automatically fix linting issues.
Before learning configuration Let’s learn about what the significant benefits are for using ESLint in any modern JavaScript or TypeScript project—especially in large or collaborative codebases like Angular or Nx monorepos.
Here are the top benefits:
- Early Bug Detection
ESLint catches issues like
- Undeclared variables
- Unused imports
- Incorrect types (via @typescript-eslint)
- Misused async/await or promises
Fixing bugs before runtime = safer code + faster debugging
- Consistent Code Style
ESLint enforces coding conventions automatically.
- camelCase vs snake_case
- Consistent indentation and spacing
- Quote style (’ vs „)
- Arrow function vs function declaration
Combine with Prettier for automated formatting!
- Improved Team Collaboration
- Makes code more readable and predictable
- Reduces subjective code review debates
- Enforces shared rules across all contributors
“The linter said no” is better than arguing in PR comments.
- Better Code Quality and Maintainability
Lint rules promote:
- Smaller functions and components
- Proper error handling
- Explicit return types (via @typescript-eslint)
- Avoiding anti-patterns like any, nested callbacks, or deeply coupled modules
Clean code = easier to test, refactor, and scale
- Real-time Feedback in Editors
- ESLint integrates with VS Code, WebStorm, and others
- Shows red squiggles while typing
- Helps junior devs learn best practices
Lint warnings feel like traffic lights for your code
- Enforce Architectural Rules (e.g., Nx Monorepo)
In Nx or large Angular apps, ESLint can enforce:
- Module boundaries (@nrwl/nx/enforce-module-boundaries)
- Proper import paths
- Domain-specific layering
Prevents spaghetti architecture in monorepos
- Avoid Security & Performance Issues
Certain plugins (e.g., eslint-plugin-security) can catch:
- eval() usage
- Insecure regex patterns
- Leaky global variables
Linting complements secure development practices
- Automation & CI Integration
- ESLint works great in CI/CD pipelines
- Block PRs that don’t meet lint rules
- Auto-fix errors with eslint –fix
Note: From ESLint v9.0.0, the default configuration file is now eslint.config.js.
If you are using a .eslintrc.* file, follow the migration guide to update your configuration file to the new format:
https://eslint.org/docs/latest/use/configure/migration-guide
Enforce quality before merge, not after
Adding ESLint to Your Angular Project
Getting started is straightforward thanks to the Angular CLI and the @angular-eslint schematics. To add ESLint to your project, run the following command in your terminal:
ng add @angular-eslint/schematicsThis command will install the latest version of @angular-eslint and its dependencies.
Migrating from TSLint (legacy)
In most cases, this automatic migration works perfectly. However, if you encounter any issues or need to run the conversion manually for a specific project within your workspace, you can use the following command. If you are using an older version, then it will work. Basically This command works up to Angular 13; you can find your project name within the angular.json file.
# Deprecated: For older Angular versions (<=13) only
ng g @angular-eslint/schematics:convert-tslint-to-eslint project-name
It will not work in the new versions (13+); this is deprecated now for new versions.
Migrate from TSLint
Skip it if you are already on ESLint. If you’re still using TSLint. This is a manual way to remove this dependency. If you are on a modern version of Angular and need to manually remove TSLint after adding ESLint, you can perform the following steps:
npx ng add @angular-eslint/schematics
npm uninstall tslint codelyzer
rm tslint.json
It intelligently uses tslint-to-eslint-config to automatically migrate your existing TSLint configuration (tslint.json) to the new ESLint format, creating a .eslintrc.json file at the root of your workspace.
After that Update angular.json lint target
After conversion, ensure your angular.json uses ESLint:
- "builder": "@angular-devkit/build-angular:tslint",
+ "builder": "@angular-eslint/builder:lint",
  "options": {
    "lintFilePatterns": ["src/**/*.ts", "src/**/*.html"]
  }
ESLint Plugins for Angular Projects
@angular-eslint/* packages:
| Plugin | What it does |
| @angular-eslint/eslint-plugin | Angular-specific lint rules for .ts files |
| @angular-eslint/template-parser | A custom parser that allows ESLint to understand Angular’s HTML template syntax. |
| @angular-eslint/eslint-plugin-template | Contains a set of rules specifically for linting Angular templates (.html files and inline templates). |
| @typescript-eslint/* | TypeScript-specific linting rules (e.g., no-unused-vars, typing checks) |
@angular-eslint/eslint-plugin-template For linting Angular templates
Note: it is essential to have @angular-eslint/template-parser if you are using @angular-eslint/eslint-plugin-template. They perform two different, but critically linked, jobs.
Think of it like a translator and a grammar checker for a specific dialect:
@angular-eslint/template-parser is the Translator.
@angular-eslint/eslint-plugin-template is the Grammar Checker.
Other plugins/packages:
eslint-plugin-import
Eslint-config-prettier While configuring this prettier, you need these dependencies too: eslint-plugin-prettier
If you are using this, you need to create a .prettierrc file too in your project.
{
"singleQuote": true,
"semi": false,
"printWidth": 100
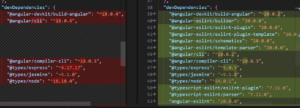
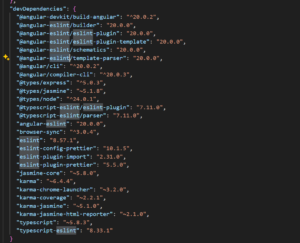
}Once the setup is complete, the ng lint command, which may not have been configured previously, will now be wired up to use ESLint, reporting any warnings or errors based on the newly configured rules. Lint needs to be configured in the angular.json file also. These plugins are dev dependencies.
npm install --save-dev packagenameWhile configuring these plugins, we need to add rules accordingly. Here I added a sample eslint.json file for reference; you can add more rules like that.
Understanding the .eslintrc.json Configuration
The heart of your new linting setup is the .eslintrc.json file. Let’s break down its structure to understand how it governs your code quality.
{
  "root": true,
  "ignorePatterns": [
    "projects/**/*",
    "dist"
  ],
  "overrides": [
    {
      "files": [
        "*.ts"
      ],
      "parserOptions": {
        "project": [
          "tsconfig.json",
          "e2e/tsconfig.json"
        ],
        "createDefaultProgram": true
      },
      "extends": [
        "plugin:@angular-eslint/recommended",
        "plugin:@angular-eslint/template/process-inline-templates",
     "plugin:import/recommended",
        "plugin:import/typescript",
        "plugin:prettier/recommended",
        "eslint-config-prettier"

      ],
      "rules": {
        "@angular-eslint/component-selector": [
          "error",
          {
            "prefix": "app",
            "style": "kebab-case",
            "type": "element"
          }
        ],
        "@angular-eslint/directive-selector": [
          "error",
          {
            "prefix": "app",
            "style": "camelCase",
            "type": "attribute"
          }
        ]
      }
    },
    {
      "files": [
        "*.html"
      ],
      "extends": [
        "plugin:@angular-eslint/template/recommended"
      ],
      "rules": {}
    }
  ]
Configuration Breakdown:
- „root”: true: This signifies that this is the root configuration file for ESLint in your project. ESLint will stop searching in parent directories for other configuration files.
- „ignorePatterns”: […]: This array specifies files and directories that ESLint should disregard during the linting process. In this configuration, it’s set to ignore all files within the projects and dist directories. Lint will bypass your libraries located in the projects/ folder, etc.
Another example here is, if you want to ignore everything in the projects/ directory except for a library named my-ui-kit, you would modify your ignorePatterns like this:
// .eslintrc.json

"ignorePatterns": [
  "projects/**/*",      // First, ignore everything inside the projects directory
  "!projects/my-ui-kit", // Then, create an exception to re-include this specific library
  "dist/"
]
Use .eslintignore if you’re running ESLint manually
Create a .eslintignore file at the project root with:
!src/app/**This ignores everything except the src/app directory.
Use this only if you’re calling eslint manually, not with ng lint
- „overrides”: […]: This powerful feature allows you to define specific configurations for different file types.
- TypeScript Files (*.ts):
- „parserOptions”: Configures how ESLint should parse your TypeScript code.
- „project”: Points to your tsconfig.json files, enabling type-aware linting rules.
- „createDefaultProgram”: A fallback that allows ESLint to lint files not explicitly included in a tsconfig.json specified in the „project” array.
- „parserOptions”: Configures how ESLint should parse your TypeScript code.
- TypeScript Files (*.ts):
Performance Warning: While createDefaultProgram: true offers convenience by preventing „file not found in project” errors, it comes at a significant performance cost. It forces the parser to construct a new, separate TypeScript program for every single file not found, which can dramatically slow down your linting process, especially in large codebases. It is primarily intended for backward compatibility and should be used with caution.
Tip: Optimizing Linting Performance in Monorepos
For developers working in a monorepo with multiple libraries (e.g., in the projects/ directory), the way you configure parserOptions has a massive impact on performance and accuracy.
The Slower, Single-Config Approach
A common initial setup might look like this, pointing to a single tsconfig.json at the root:
// .eslintrc.json (in the workspace root)
{
  // ...
  "overrides": [
    {
      "files": ["*.ts"],
      "parserOptions": {
        "project": ["tsconfig.json"], // Points to one central tsconfig
        "createDefaultProgram": true // SLOW: Used as a fallback for library files not in the main tsconfig
      },
      // ...
    }
  ]
}
This configuration forces ESLint to build a massive program for your entire application and then use the slow createDefaultProgram fallback for any library files not covered. This is inefficient and can lead to long wait times for lint results.
The Faster, Recommended Multi-Config Approach
The best practice for performance and maintainability is to give each project (application or library) its own ESLint configuration. When you generate a new library with ng generate library my-lib, Angular CLI will typically create a dedicated .eslintrc.json for it.
Here’s how the structure works:
- Root .eslintrc.json: Contains global rules and ignores.
- Library-specific .eslintrc.json: Each library gets its own config file that points to its own dedicated tsconfig file.
Example: projects/my-data-access/.eslintrc.json
{
  "extends": "../../.eslintrc.json", // Inherits from the root config
  "ignorePatterns": ["!**/*"], // Ensures all files in this lib are linted
  "overrides": [
    {
      "files": ["*.ts"],
      "parserOptions": {
        // RECOMMENDED: Point to the library's specific tsconfig
        "project": ["projects/my-data-access/tsconfig.lib.json"],
        // "createDefaultProgram" is no longer needed here!
      },
      "rules": {
        // You can add rules specific to this library here
      }
    },
    {
      "files": ["*.html"],
      "parserOptions": {
        "project": ["projects/my-data-access/tsconfig.lib.json"]
      }
    }
  ]
}
Benefits of this approach:
- Massive Performance Boost: When you lint a specific library, ESLint only needs to create a TypeScript program for that small subset of files, making the process exponentially faster.
- Improved Accuracy: Type-aware rules are more reliable because they operate on the precise configuration defined for that library.
- Better Scalability: Your linting performance remains high as your monorepo grows, as each part is linted in isolation.
By taking the time to set up separate, targeted configuration files, you ensure your development workflow remains fast and efficient, no matter the size of your project.
- „extends”: Specifies base configurations from which your setup will inherit rules.
- plugin:@angular-eslint/recommended: A set of recommended linting rules for Angular TypeScript code.
- plugin:@angular-eslint/template/process-inline-templates: Enables ESLint to process and lint inline HTML templates within your component files.
- „rules”: Here, you can customize or override the inherited rules. For example, the @angular-eslint/component-selector and @angular-eslint/directive-selector rules enforce consistent naming conventions for your components and directives.
- HTML Files (*.html):
- „extends”: Inherits from plugin:@angular-eslint/template/recommended, which provides a set of best-practice rules for Angular templates.
- „rules”: This is left empty, meaning no additional rules are being added beyond the recommended set for HTML files. You can, of course, add your own rules here.
Useful JS/TS rules to enable:
"rules": {
  "no-console": "warn",
  "prefer-const": "error",
  "arrow-body-style": ["error", "as-needed"],
  "@typescript-eslint/explicit-function-return-type": "warn"
}
Commands to Run ESLint
npx ng lintAutomatically Fixing Linting Issues
One of the most significant advantages of using a linter is the ability to automatically fix many of the issues it finds. To do this with ESLint, you can run the following command: either you can simply run the npx command or update scripts in the package. json file with the new approach.
npx eslint . --fix

{
  "lint": "ng lint",
   "lint:fix": "ng lint --fix"
}
This command tells ESLint to scan all the files in the current directory (.) and apply automatic fixes (–fix) for any rules that are fixable. This can save you a tremendous amount of time and effort in adhering to your coding standards. It’s a good practice to run this command periodically to keep your codebase clean.
Note: Now ESLint is installed by default in Angular 20 projects.
Nx Monorepo ESLint Rules
If you’re using Nx, ESLint integrates deeply for enforcing workspace-level constraints.
For the Nx project, we need to configure lint for every library.
npm install --save-dev @nrwl/eslint-plugin-nxBy following these steps, you can successfully integrate ESLint into your Angular project, ensuring a higher standard of code quality and a more maintainable application in the long run. Thanks for reading. This is a comprehensive ESLint setup guide for an Angular app.
In another blog, I will discuss more about how you can configure ESLint with Husky.
Happy coding!